
Something like a fly-Breakdown
- cwisbg

- Oct 22, 2019
- 2 min read
Jumping into Zbrush one day Something like a fly was born. Using flies and cicadas as reference I started building out this creature using zpheres and adjusting until things had the buggy feel I was going for.
Finding the look
Wanting to start building out the lighting and materials I brought a very rough version of the bug into Maya to see how the mesh would play with the lighting and setting up my scene to be able to deal with zbrush updates.


Hair
The hair was created using Maya's PaintEffects. I wasn't planning on animating this character so no need for more complex dynamic setups. Just paint, convert to geo and render.


PaintEffects Pro tip:
When painting on mesh PaintEffects creates curves under the shape node. After awhile these add up and impact scene performance. Usually a good idea to clean these up when adjusting inst needed anymore.

Hair shading:
Using Redshift3d's material I used a ramp to drive the color and played with the translucency and spec.

Rigging:
I usually add some kind of simple rigging to all my characters. I just find it helpful for last minute posing and adjusting.
Basic workflow consisted of using the snap to mesh center and drawing out the joints, then binding main parts, body and legs and getting the skin smoothed for those. The hair and other details like the claws were also bound to the joints but then the weights were copied from the main parts to the details. This ensure there is minimal distortion and that the hair follows the correct body parts.

The stick


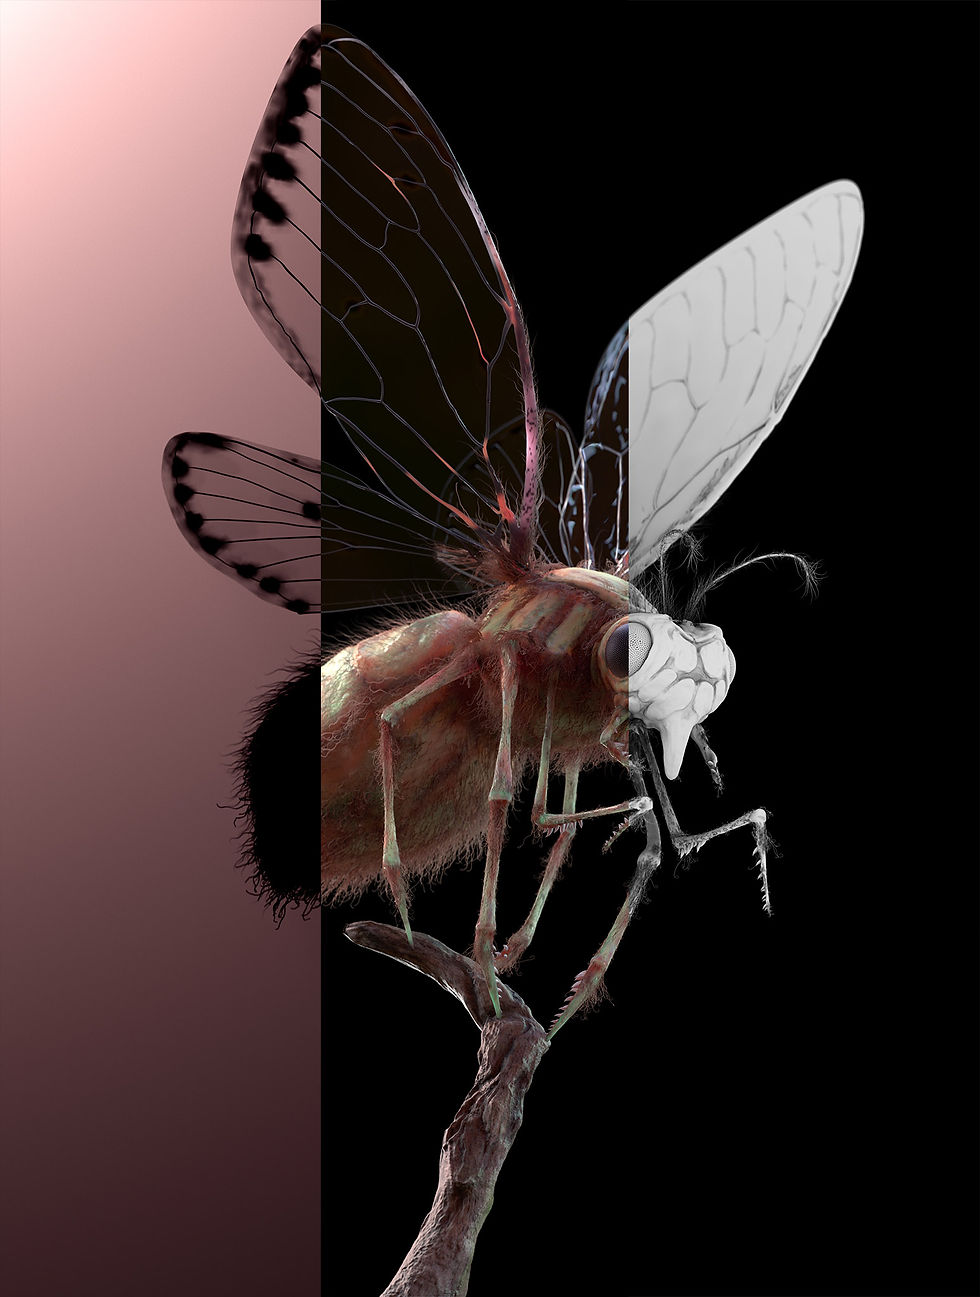
Wings:
The key for the wings was the structure of the vein part. Once I got a good pattern the wings started to look better and the next thing was the transparent part. This was simpler than I thought and just needed some ridges to capture some reflections.


Lighting:
Using Redshift3d for the rendering. Knowing from the beginning I wanted a heavy rim light I started there and continued until the bug details were getting some nice light.


Dialing in the SSS (Sub Surface Scatter)

Compositing:
Using After effects I had a few passes to work with. I used an AO, Volume and a facing ration pass to gives it a little bit of an SEM look and to add some atmosphere. After a bit of tweaking and layering I was getting what I wanted.


Comments